
Version 1.0.0 Newest
AddedNow part of Programs For You: one app with School Calendar, Email Assistant, and Screen Assistant inside. Updates only when you click Check for Updates.

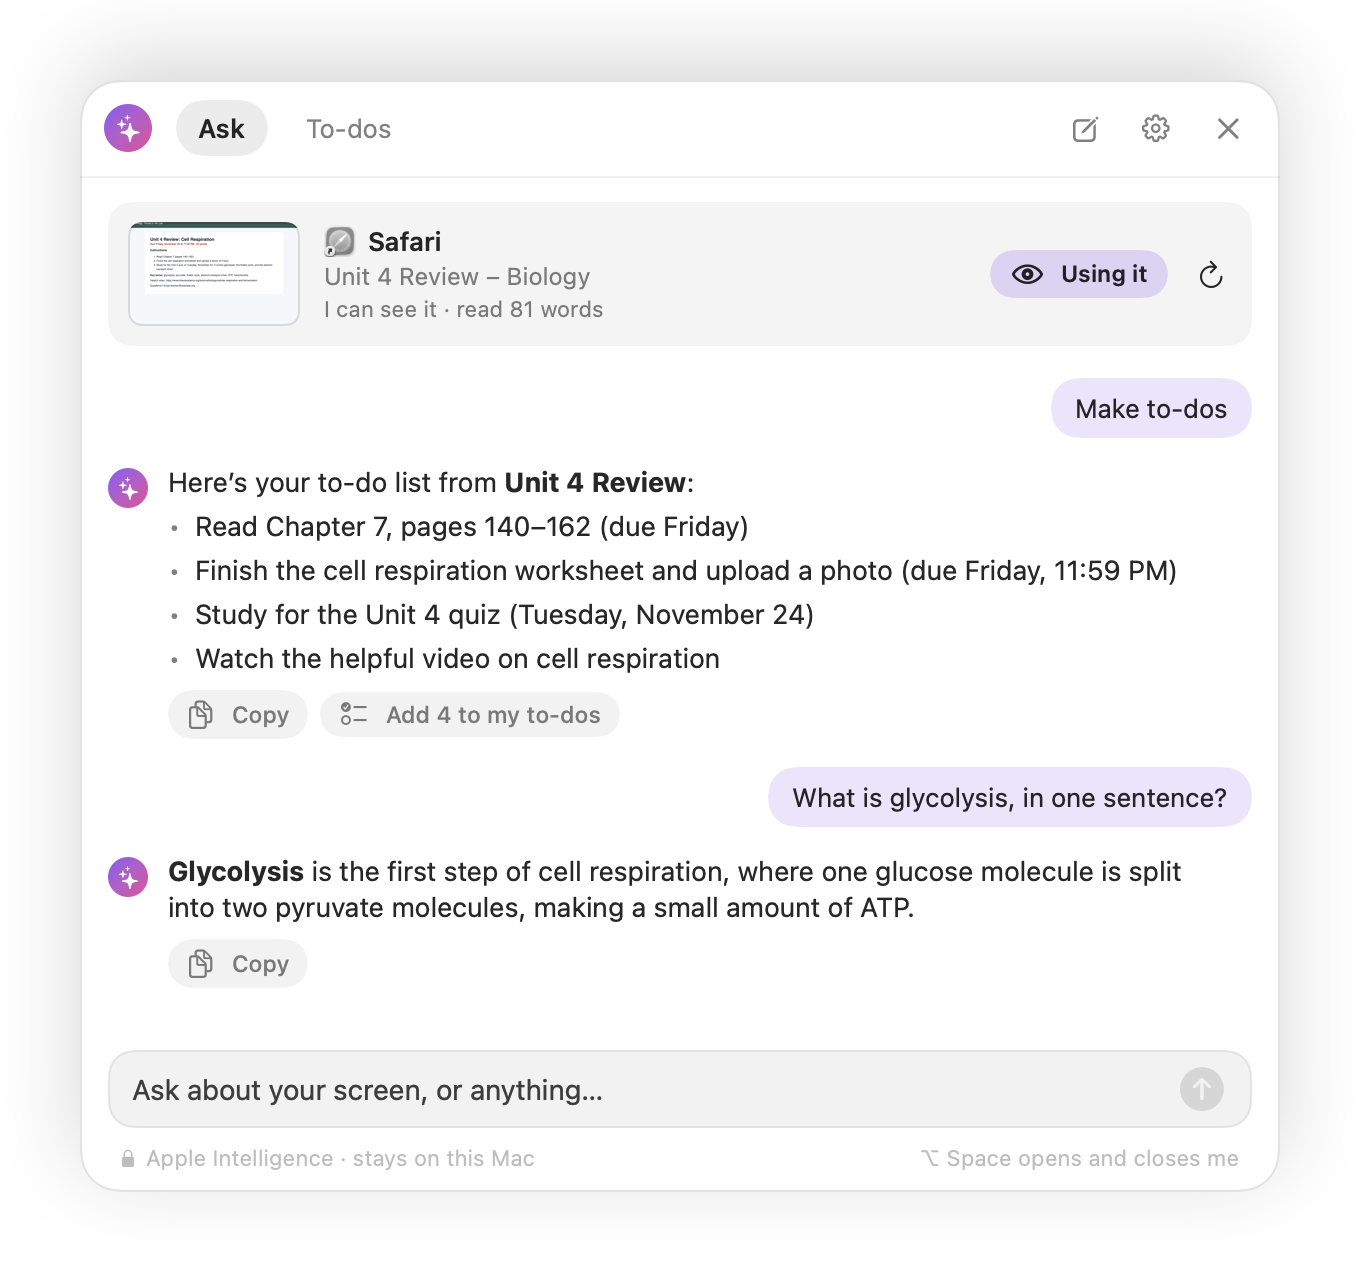
Press ⌥ Space and your personal assistant looks at what you’re working on. Ask it to sum it up, explain it, make a to-do list, write a reply, or quiz you.
Free downloadRequires macOS 26 Tahoe or newer on a Mac with Apple silicon (M1 or later) · Windows version coming soon · Free
Features
Press ⌥ Space anywhere, or click its button at the top of your screen. Press it again to close.
It looks at the window you’re using (or your whole screen) and reads the words on it.
Summarize, Explain, What’s next?, Make to-dos, Write a reply, and Quiz me.
Ask about your screen, or about anything at all, and keep the conversation going.
Turn an assignment into a to-do list in one click, and get a reminder before it’s due.
Due dates, links, and email addresses on your screen become buttons: remind me, open, or write an email.
It never watches or records your screen, and it doesn’t save pictures.
Uses Apple Intelligence, so what’s on your screen stays on your computer.
Add a Claude API key and it sees the actual picture, which is great for charts, diagrams, and math.
Instructions
Download the app and open it the first time by following the install guide.
The first time, your Mac asks whether Screen Assistant can record your screen. Click Open System Settings, turn on Screen Assistant under Privacy & Security → Screen & System Audio Recording, then click Quit & Reopen.
“Record” sounds scary, but it only takes one picture each time you open it. It never records video.
Press ⌥ Space (Option and Space together). It looks at the window you’re using and shows a small picture of it, so you know what it sees. Press ⌥ Space again or Esc to close it.
Summarize gives you the key points. Explain puts it in simple words. What’s next? tells you what to do now. Make to-dos pulls out the tasks. Write a reply answers a message. Quiz me makes practice questions.
Type in the box and press Return. It remembers the conversation until you close it or click New chat. To ask something that has nothing to do with your screen, click Using it to turn the screen off for that chat.
After Make to-dos, click Add to my to-dos. Open the To-dos tab to check things off, and click the bell to get a reminder. The first time, your Mac asks to allow notifications: click Allow. Dates on your screen also show up as Remind me buttons.
Switched windows? Click the round arrow next to the picture to look at the window again or at your whole screen. You can also copy all the words on the screen from there.
Click the gear (or right-click the button at the top of your screen and choose Settings) to change the shortcut, look at your whole screen instead of one window, pick short or detailed answers, and open it when you log in.
In Settings, turn on Use my Claude API key and paste a key from console.anthropic.com. (Anthropic only lets adults, 18 and older, make an account and a key, so if you’re under 18, ask a parent or guardian, or skip this and use the AI built into your Mac.) Claude sees the actual picture of your screen, so it’s better with charts and math. The picture is sent to Anthropic, and Anthropic charges your API account a small amount for each answer, so only do this if you’re OK with that.
Using it for school: Screen Assistant is great for understanding lessons, studying, and staying organized. Follow your teacher’s and school’s rules about using AI on assignments and tests, and double-check important answers, because AI can make mistakes.
Your privacy: Screen Assistant only looks when you open it, never records video, and doesn’t save pictures. With Apple Intelligence, everything stays on your Mac. Read the Privacy Policy.
Open System Settings → Privacy & Security → Screen & System Audio Recording and turn on Screen Assistant, then quit it and open it again. If it’s already on but still doesn’t work, select Screen Assistant in that list, click − to remove it, then open Screen Assistant and allow it again.
Another app may already use that shortcut. Settings shows a message if so. Pick a different shortcut in Settings, or click the button at the top of your screen.
Turn it on in System Settings → Apple Intelligence & Siri. If it was just turned on, it may still be downloading, so try again later. Macs that can’t run Apple Intelligence can use a Claude API key instead (step 9).
That’s normal. macOS checks in now and then about apps that can see your screen. Click Allow to keep using it.
Updates
Click Check for Updates in the app to get the newest version. Here’s what recent updates fixed and added.
AddedNow part of Programs For You: one app with School Calendar, Email Assistant, and Screen Assistant inside. Updates only when you click Check for Updates.
FixedAutomatic updates are more reliable: they also check right after your Mac wakes up.
AddedIf the app is running from your Downloads folder, it offers to move itself to Applications so it can keep updating.
Free for Mac. Download it, then follow the install guide.
Requires macOS 26 Tahoe or newer on a Mac with Apple silicon (M1 or later).